Setting up your Unity environment to work with AdHawk eye tracking in VR
This guide will walk you through getting your development environment set up to create eye tracking-enabled VR applications for Hack the North.
Installing AdHawk eye tracking software
In order to route eye tracking data from the tracking hardware installed into the Meta Quest 2 headset through to your Unity application, you’ll need to install some AdHawk software on your computer.
- download the ‘Eye tracking software’ from the AdHawk Hack the North software page
- install the software to your computer
- run AdHawk Backend on your computer; this is the program that responds to API requests and routes eye tracking data to your application—AdHawk Backend must be running in order to receive data from the eye tracker
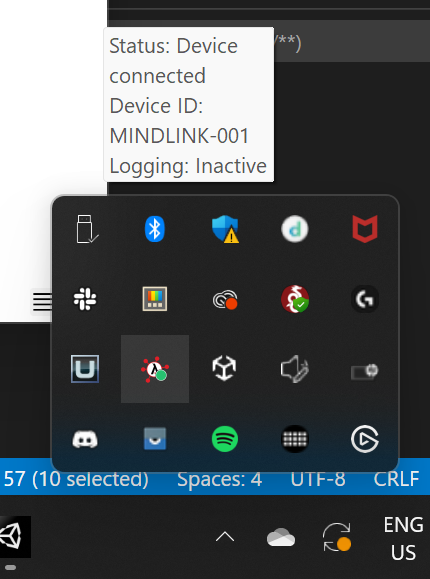
- when AdHawk Backend is running, it will sit in your System Tray (on Windows; see below) and let you know if a device is connected successfully or not
- you can stop AdHawk Backend by right clicking on the System Tray icon (shown highlighted below) and selecting ‘Exit’
Installing Unity Hub
Unity Hub is used to keep Unity editors, projects, and additional resources organized.
Installing Unity
Next, install Unity 2021.1.21f1. We can only support this particular version for the Hack the North work, so we strongly recommend using this version only. Working with another version may introduce unexpected bugs or incompatibilities with our API or the Meta Quest 2 headset plugin.
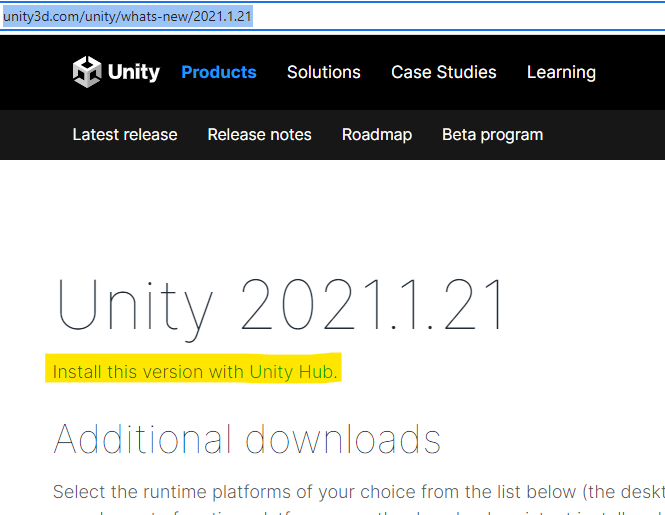
- download and install Unity 2021.1.21f1. From the linked page, it is best to use the “Install this version with Unity Hub” link—highlighted in the image below—to manage the installation within Unity Hub.
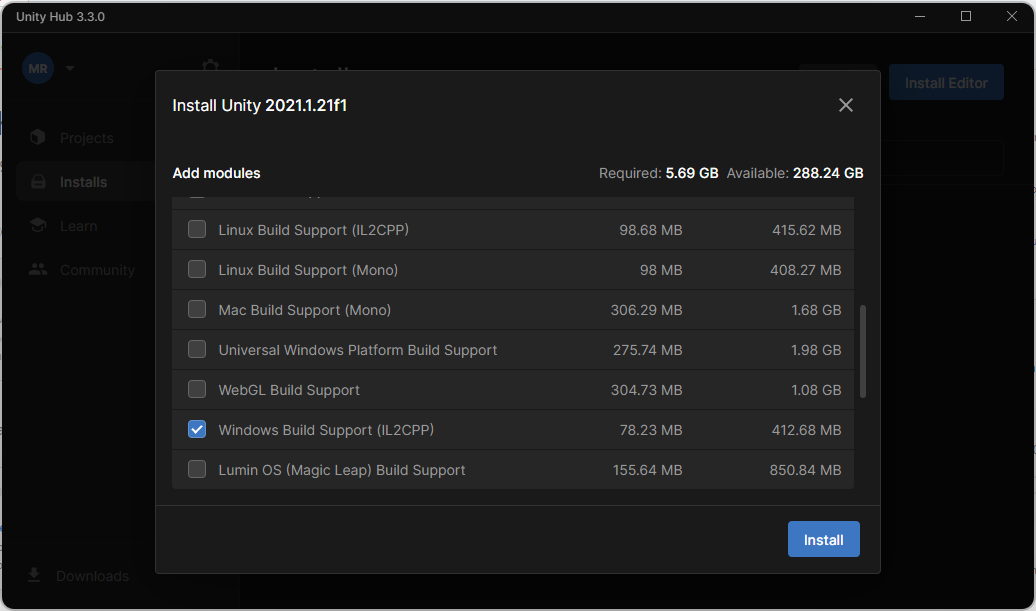
While setting up the installation of the Unity editor, you’ll be able to enable additional modules. Ensure you check off:
- Dev Tools → Microsoft Visual Studio Community 2019
- Platforms → Windows Build Support (IL2CPP)
If you forget to add modules for your editor during the initial installation, you can add them after the installation has finished:
- from the Installs page, click on the settings icon for the editor install you’d like to change
- select ‘Add modules’ from the menu
- check the modules you’d like to add
- install the modules
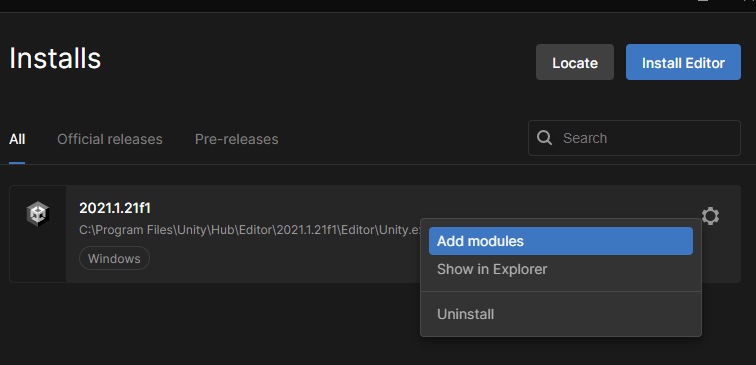
After the Unity editor is installed with the correct modules added, you should see it listed on the Installs tab.
Creating a Unity account
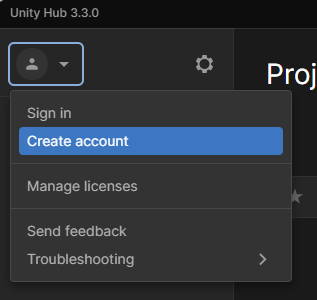
To use Unity, you’ll need a license. But before you can get a license, you’ll need a Unity account. To create a Unity account: - open Unity Hub - click on the profile icon in the top right corner of the window - select ‘Create account’ - you’ll be redirected to a web page in your browser where you can provide the necessary information to create an account
Creating and installing a license
In order to use Unity, you’ll need to create and install a license. Unity is available for personal use for a wide range of folks.
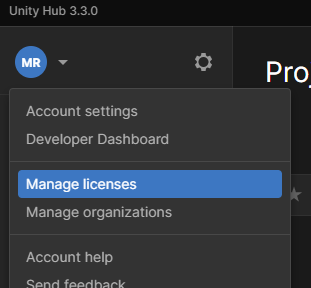
To create a license: - open Unity Hub - click on the profile icon in the top left corner - sign in with your newly created (or existing) Unity account - click on the profile icon in the top left corner - select ‘Manage licenses’ from the drop down menu
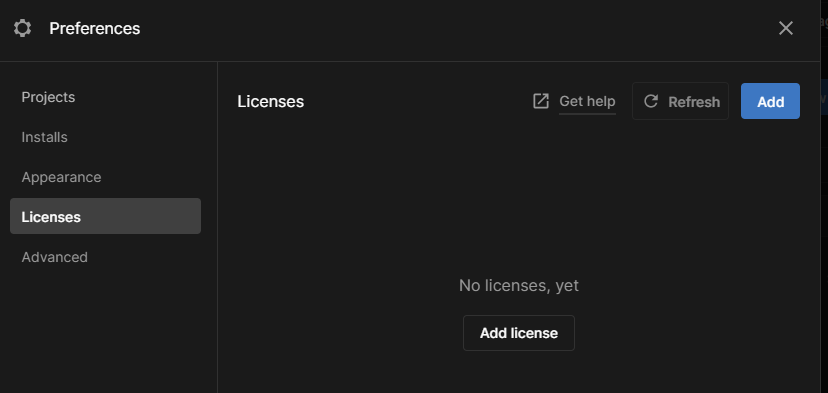
- click on the ‘Add license’ button
- click the ‘Get a free personal license’ button
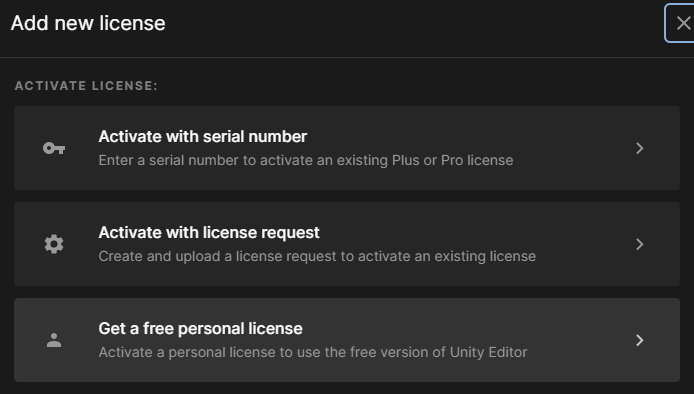
- read and agree to the terms
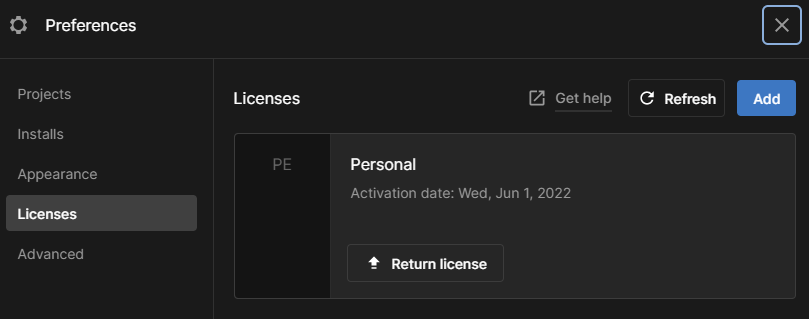
- after receiving the license, it should be listed on the Licenses tab of the Preferences dialog
Installing the Unity SDK and example code
The AdHawk Unity SDK is provided as a Unity project containing several example scenes, components, and the code to tie them together.
You can access the SDK and example code from the AdHawk github repo. Save it to a local directory, then add it to Unity Hub:
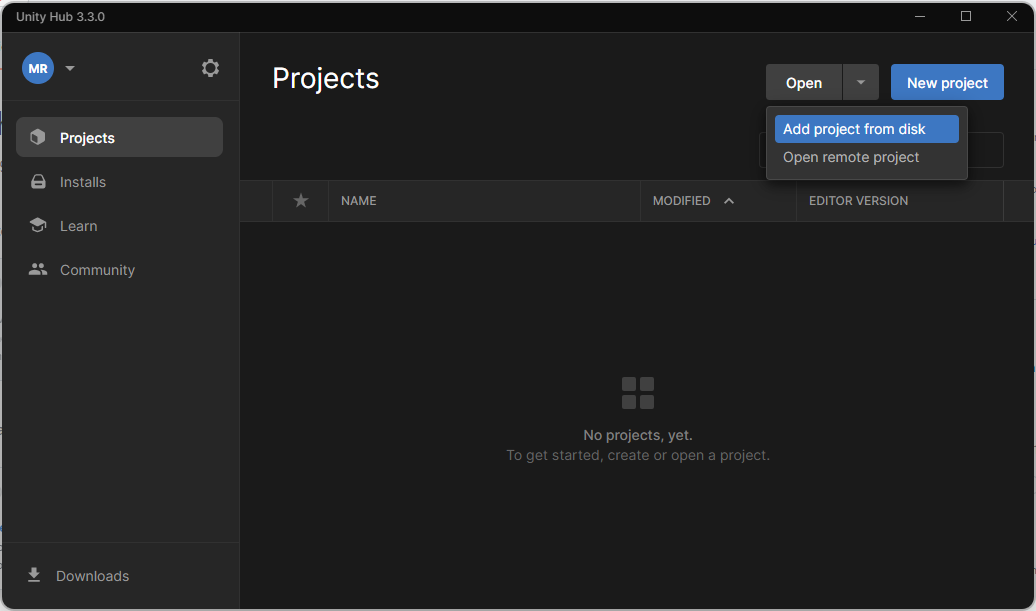
- from within Unity Hub, go to the Projects tab
- click on the dropdown triangle of the Open button
- select ‘Add project from disk’
- choose the top level of the code you brought down from the AdHawk github repo
- this directory should contain subdirectories such as Assets, Packages, ProjectSettings, and User Settings
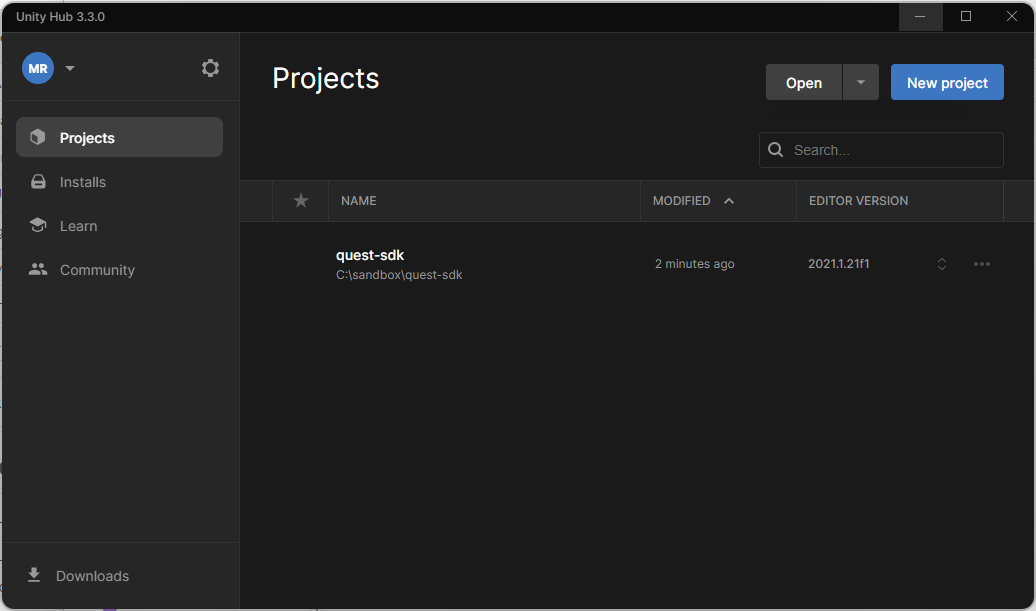
To open the project, double click on the project in the Projects tab. Your Unity editor should launch with the project code loaded.
Customizing your Unity layout
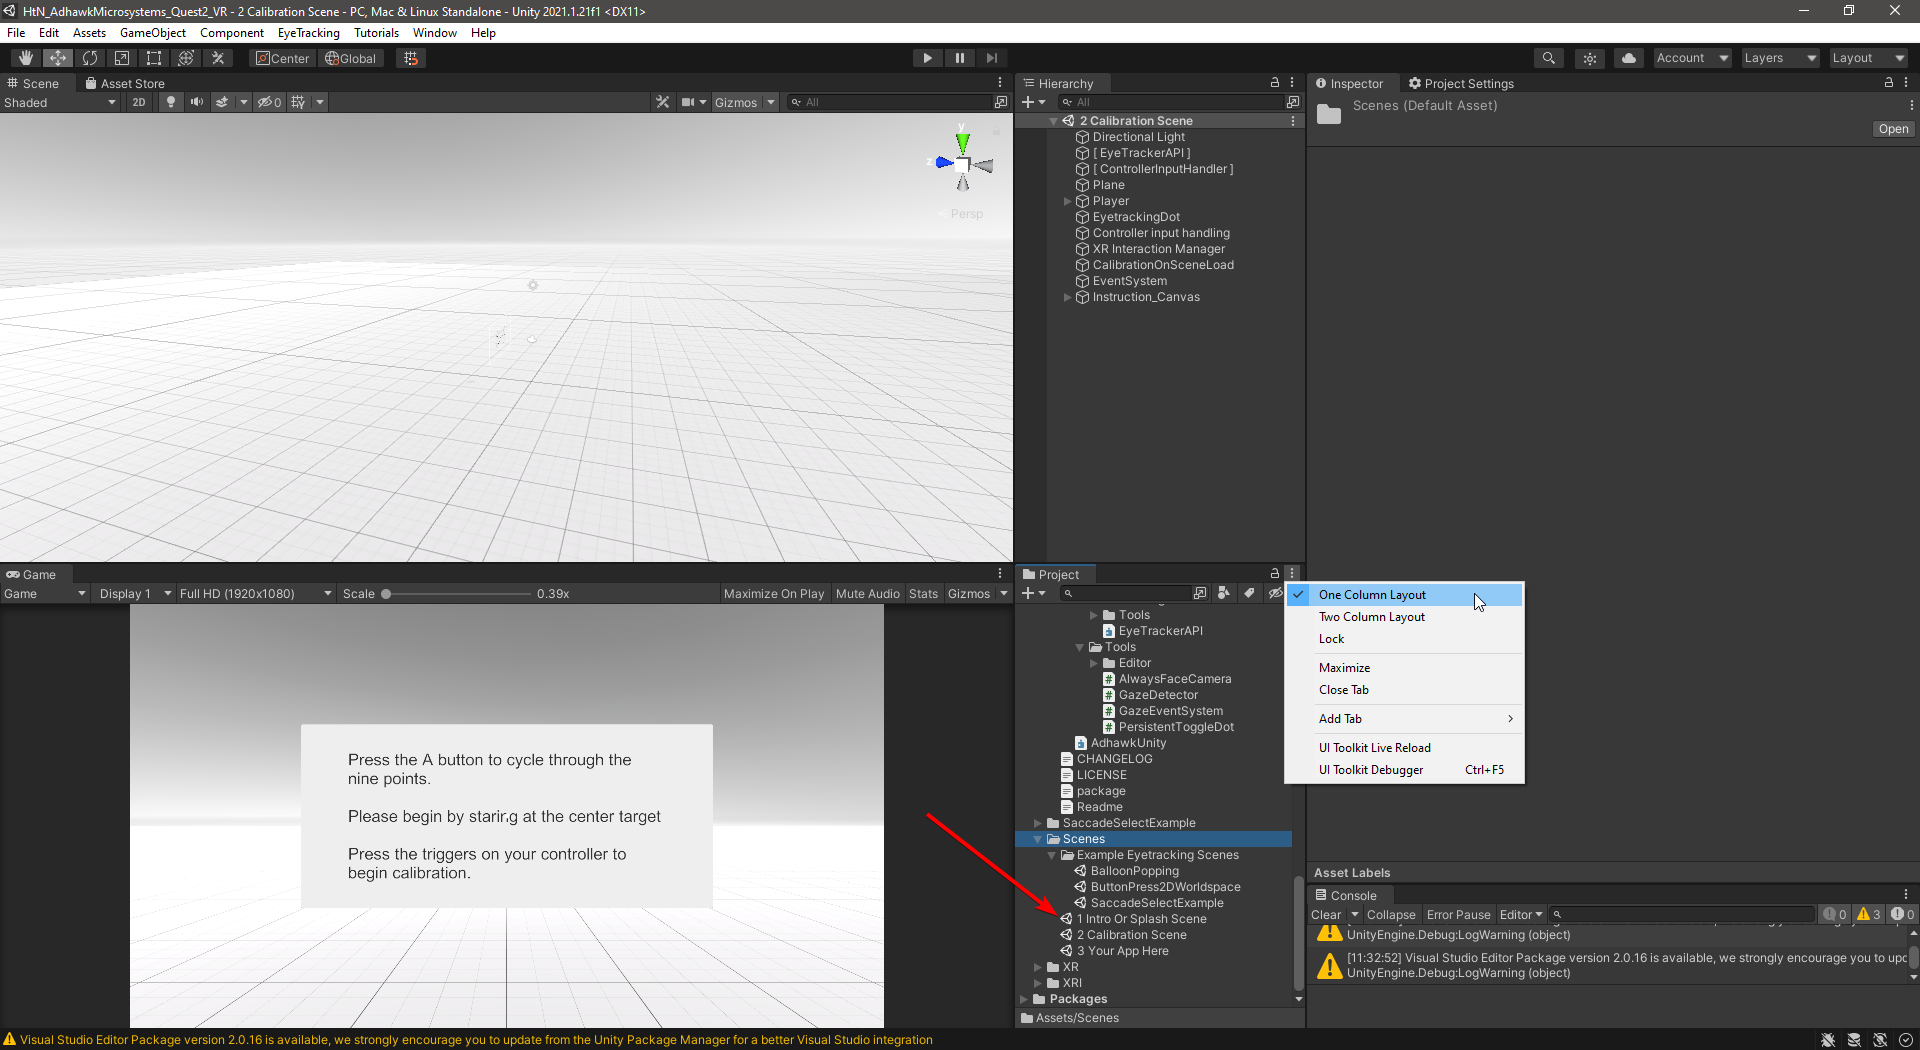
Unity is a complex application. In order to clearly access and understand the components, scripts, and scenes provided as part of the AdHawk Unity SDK and example code, the following layout is recommended (you’re welcome to use a different layout, of course, but a layout such as this is quite effective)
